
Save Time and Money
with Aatrix and NetSuite
Instructions to install the Aatrix Enhanced 1099 Reporting SuiteApp and connect your NetSuite account.
FAQs for NetSuite users new to Aatrix eFile
Ready for Year-end 1099 Reporting? Get Started Today!
Streamline Your 1099 Reporting with Aatrix eFile.
Enhanced 1099 Reporting built exclusively for NetSuite users. Automate your 1099-MISC and 1099-NEC filing process with seamless integration and guaranteed compliance.
Why Choose Aatrix Enhanced 1099 Reporting?
Built for NetSuite as a native bundle, our solution transforms complex 1099 reporting into a simple, automated process that saves time and eliminates compliance concerns.
Seamless NetSuite Integration
Native bundle designed specifically for NetSuite ensures smooth implementation and flawless operation within your existing workflow.
Flexible Filing Options
Selectively eFile any combination of Federal and State 1099-MISC or 1099-NEC forms - all from one platform.
Guaranteed Compliance
Automatically conforms to Federal and State requirements, presenting only valid filing choices for forms that must be filed electronically.
Direct Agency Filing
Your information is transmitted securely and directly to the appropriate agencies - no manual intervention required.
Complete Transparency
Receive email confirmation when your file is received, with full visibility into processing and delivery status.
Secure & Reliable
Enterprise-grade security ensures your sensitive tax data is protected throughout the entire filing process.
How Aatrix Enhanced Reporting Connects NetSuite to Your 1099 Filing
The Aatrix Enhanced 1099 Reporting SuiteApp integration allows for seamless import of vendor and transaction data from NetSuite to prepare and process your 1099 MISC & NEC forms.
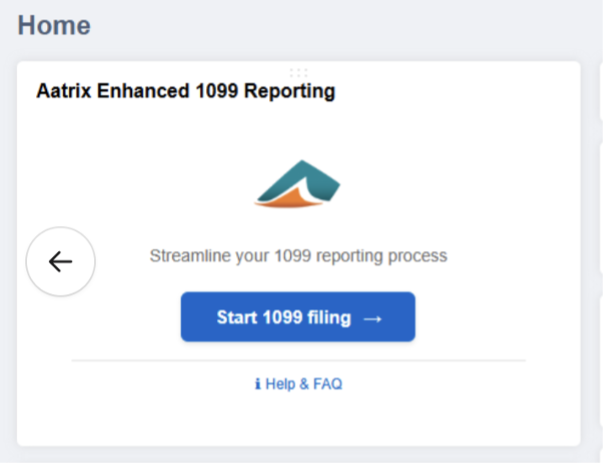
To get started, add the Aatrix Enhanced 1099 Reporting SuiteApp to NetSuite from the SuiteApp Marketplace, then click Start 1099 filing.
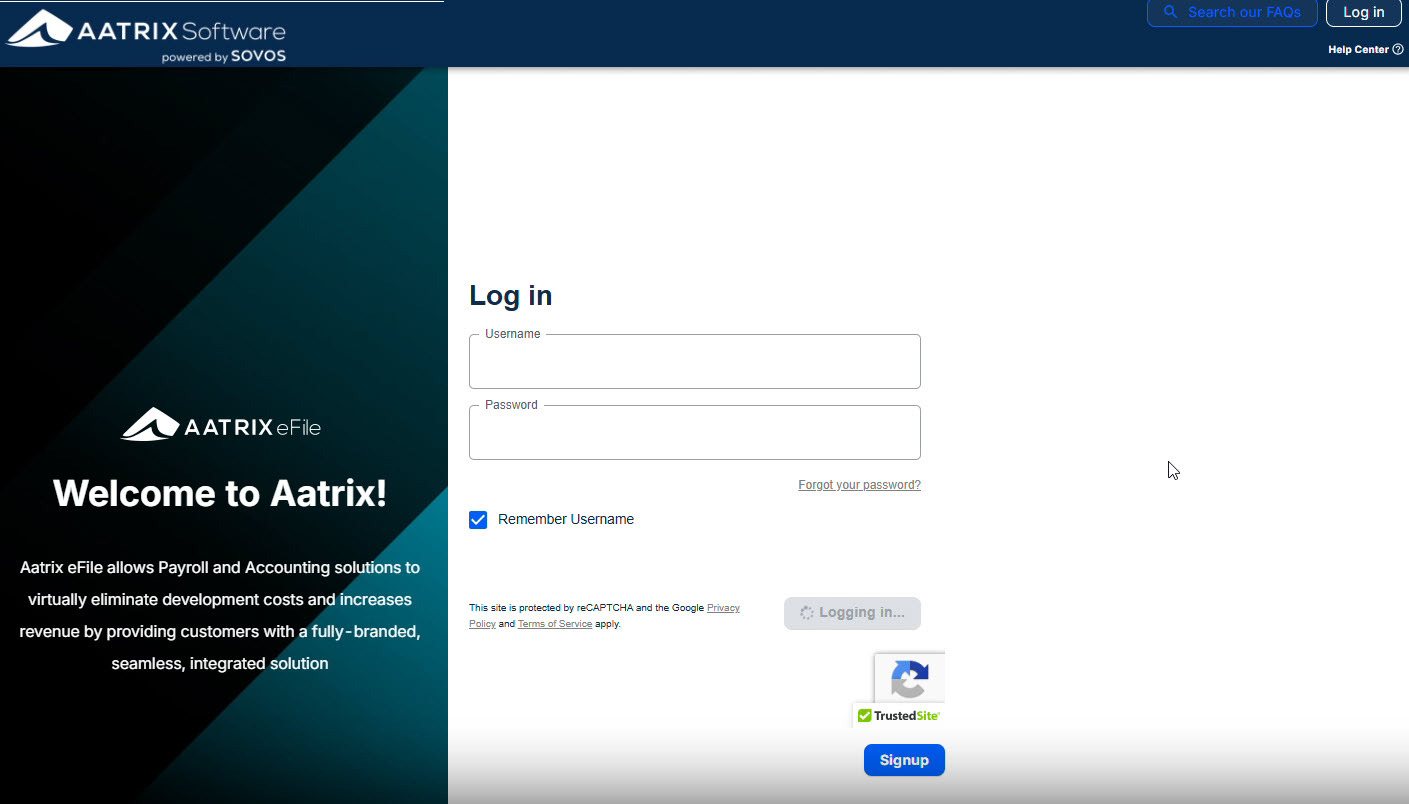
Click Signup to walk through the process of creating an Aatrix eFile Account.
*If you already have an eFile account with Aatrix, you can use your credentials to log in. You are not required to create a new eFile Account.
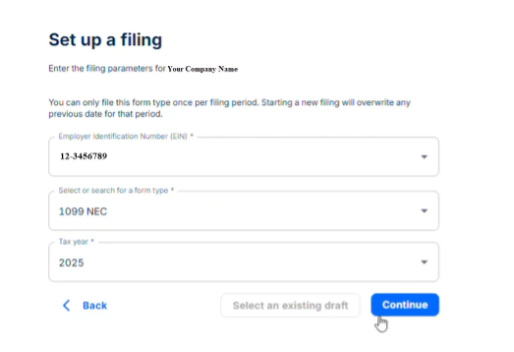
Select Form Type
Begin by selecting the form type you need to file (1099-NEC or 1099-MISC). Select your Employer Identification Number (EIN) and tax year.
Review Data Access Consent
Review and agree to the data access consent. This screen explains what information will be imported from your NetSuite account and how it will be used.
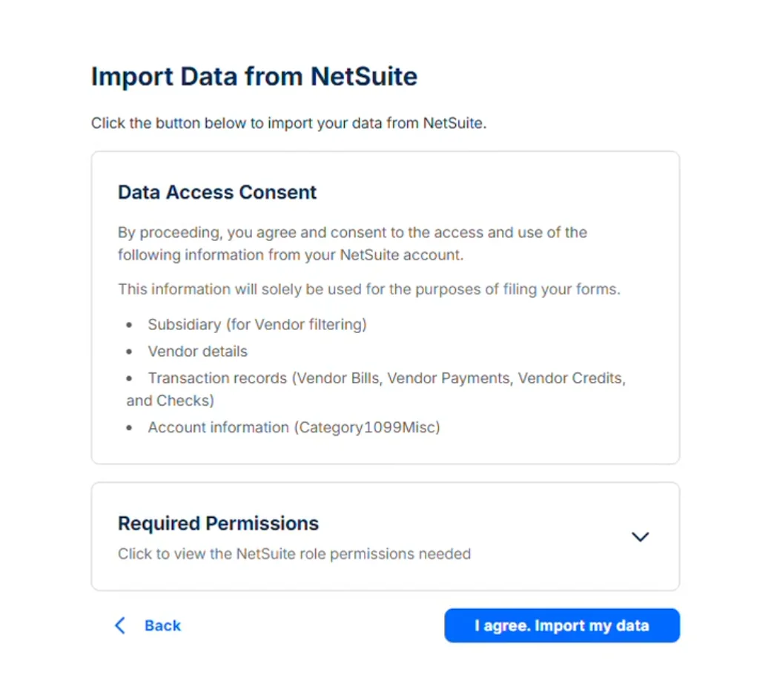
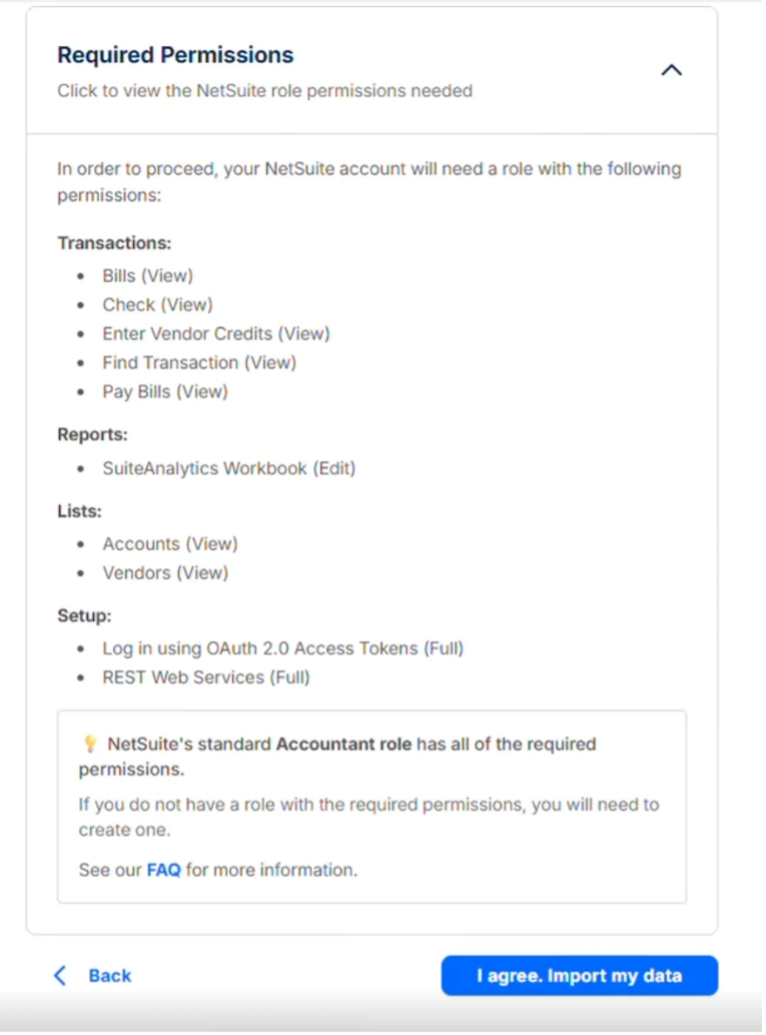
Verify Required Permissions
Ensure your NetSuite account has the required permissions. The standard Accountant role includes all necessary permissions for the integration to function properly.
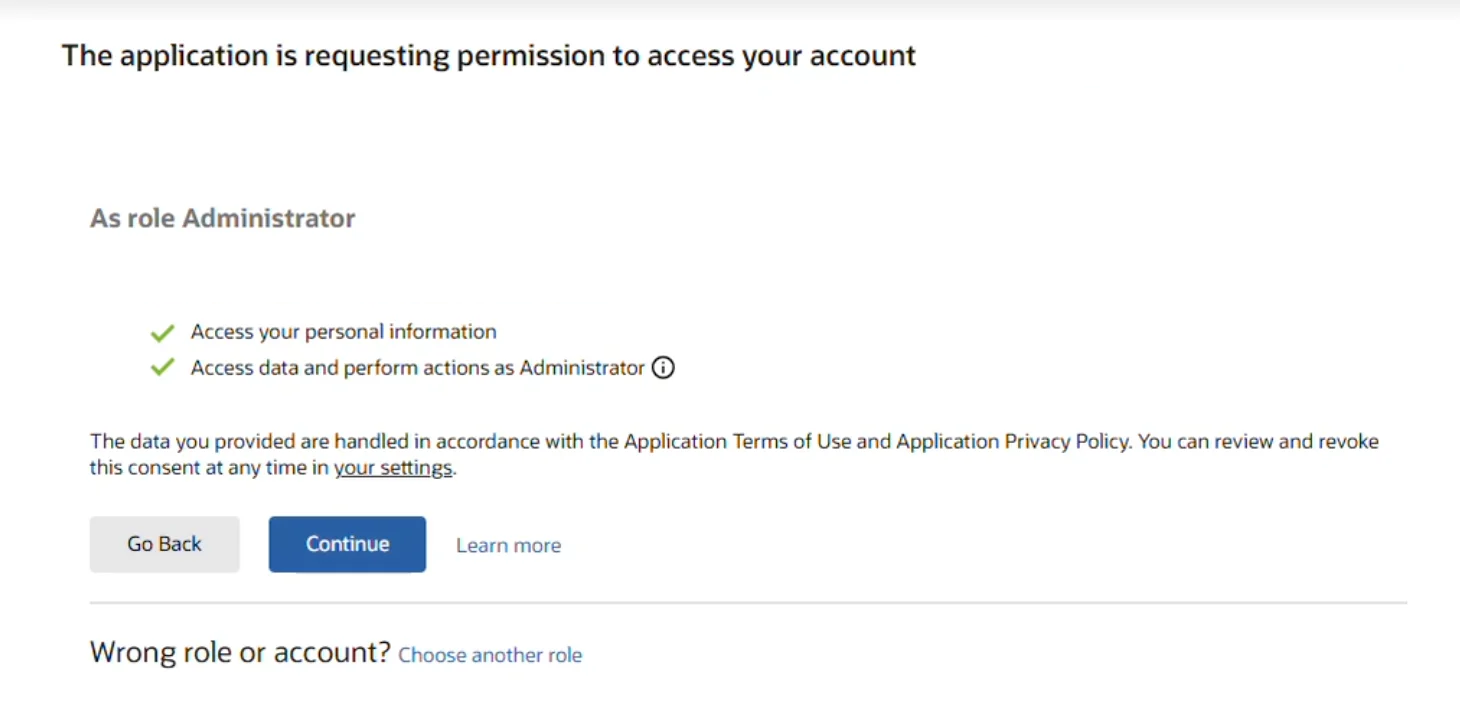
Authorize Account Access
Authorize the application to access your NetSuite account. This grants the necessary permissions to import your vendor and transaction data.
Wait for Data to Load
The system will load startup information from NetSuite. This process may take a few moments, depending on the size of your data.

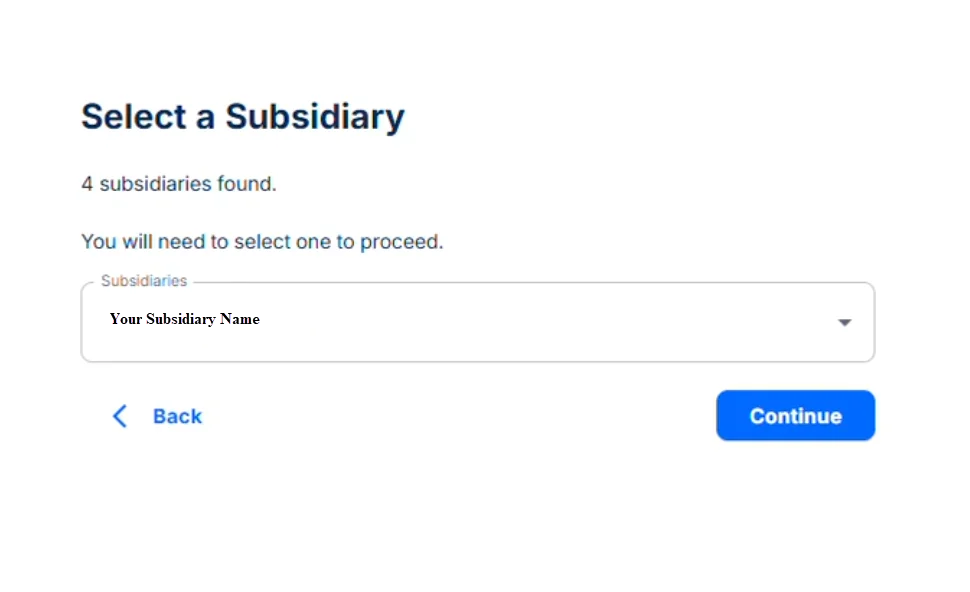
Select Subsidiary
If your NetSuite account has multiple subsidiaries, select the one you want to use for this filing. You will need to complete separate filings for each subsidiary.
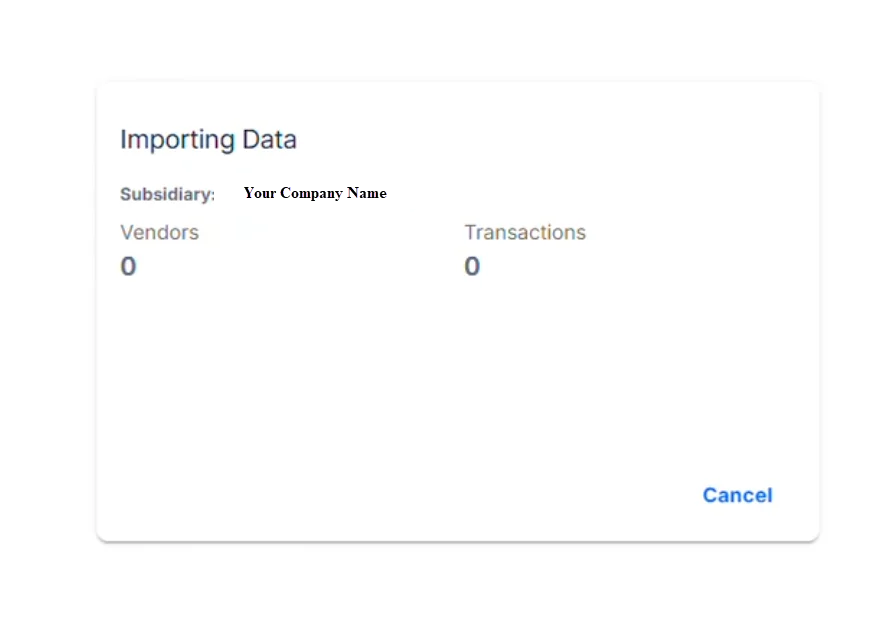
Import Vendor and Transaction Data
The system will import your vendor details and transaction records from NetSuite. Progress will be shown for both vendors and transactions.
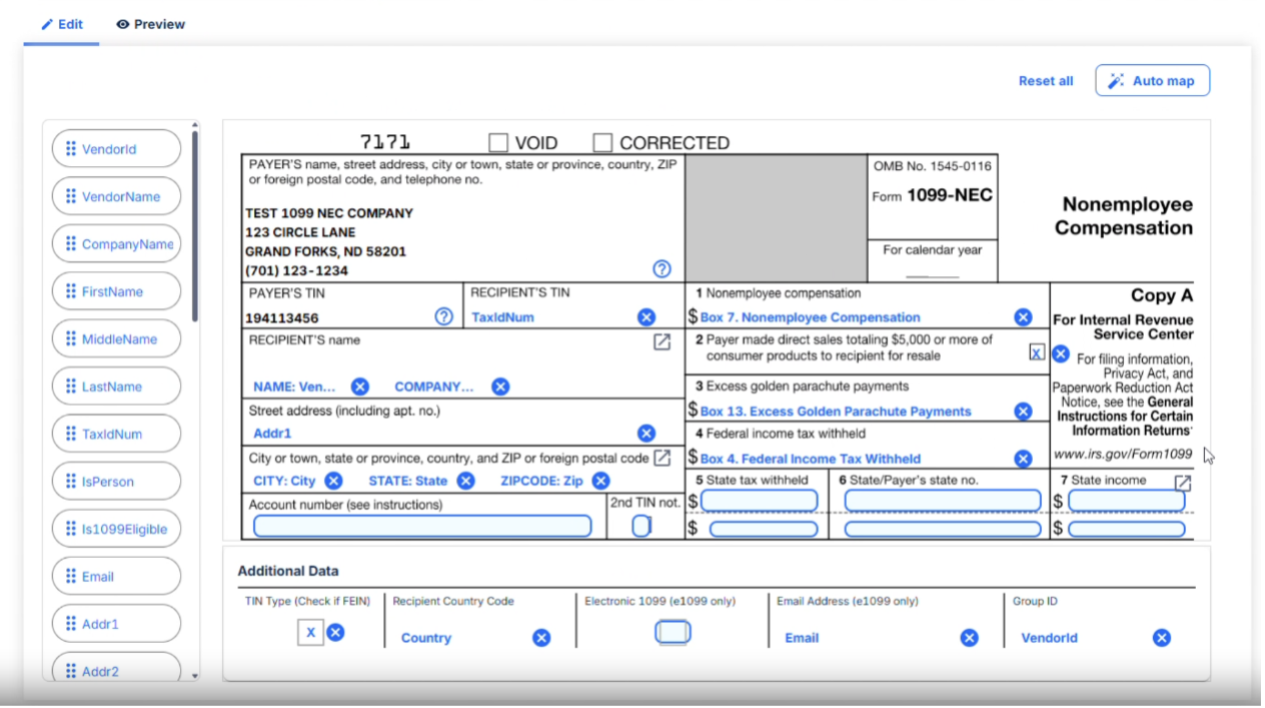
Working with Field Mapping
After importing your data, you'll use the mapping tool to ensure your NetSuite data maps correctly to the 1099 form into the correct fields.
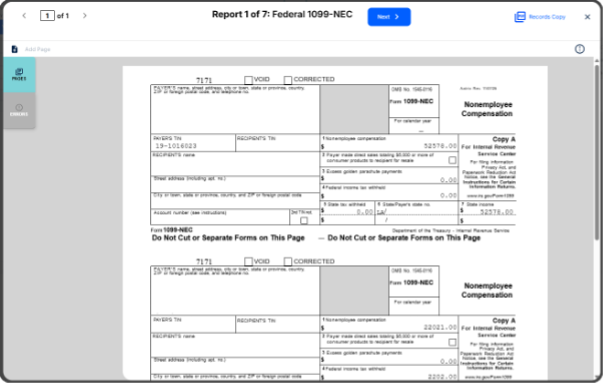
The Preview tab shows how your data will appear on the final 1099 form.
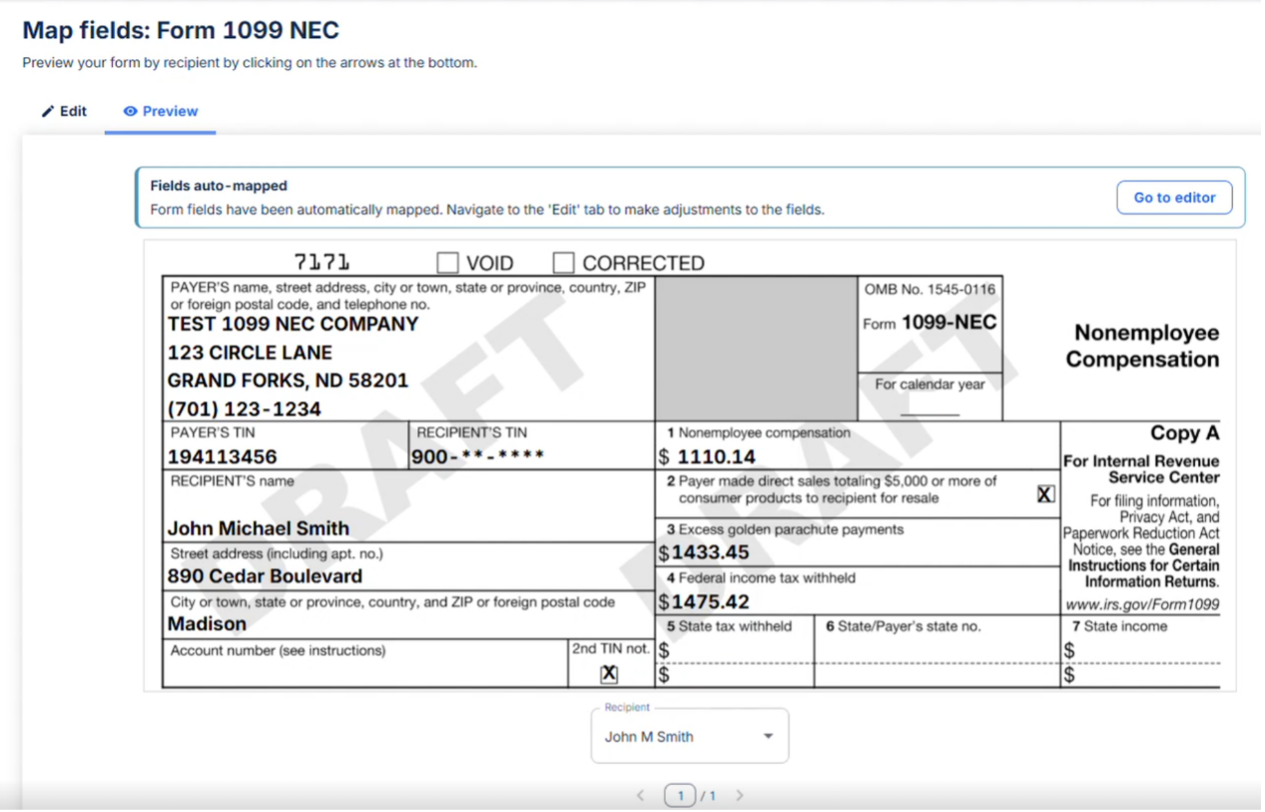
Use the Edit tab to adjust field mappings if needed. The system automatically maps fields based on your NetSuite data structure, but you can customize mappings to match your specific requirements. Use the 'Auto map' button to apply intelligent mapping suggestions, or manually adjust individual fields by dragging and dropping data elements from the left side on to the form itself. Click the blue X to remove any incorrectly mapped data elements.
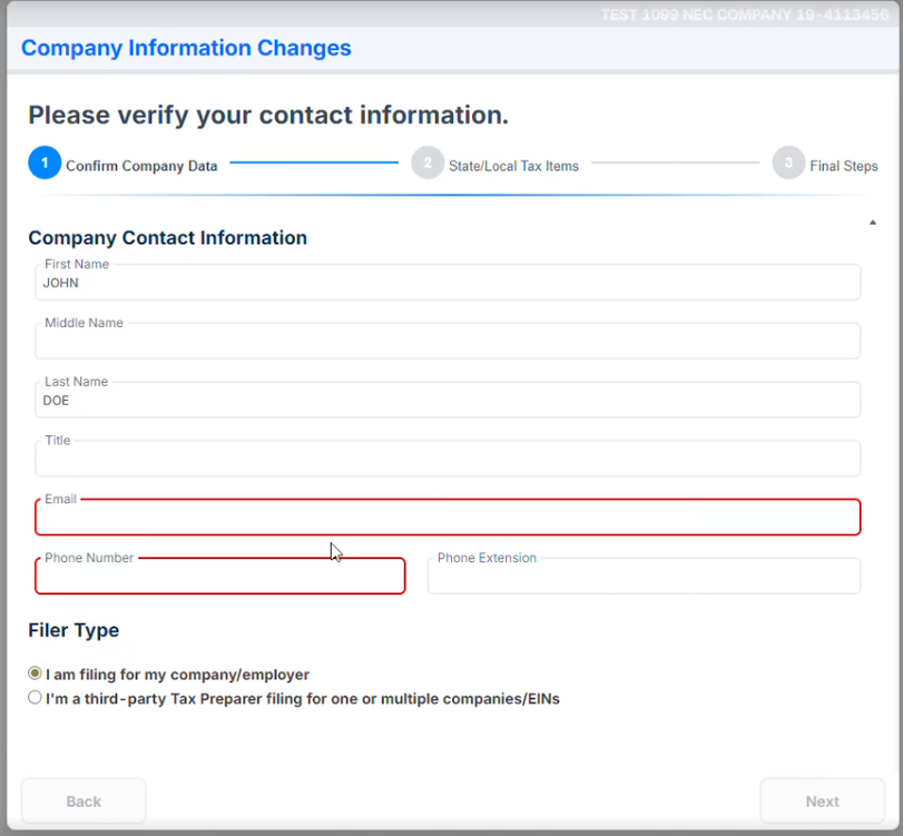
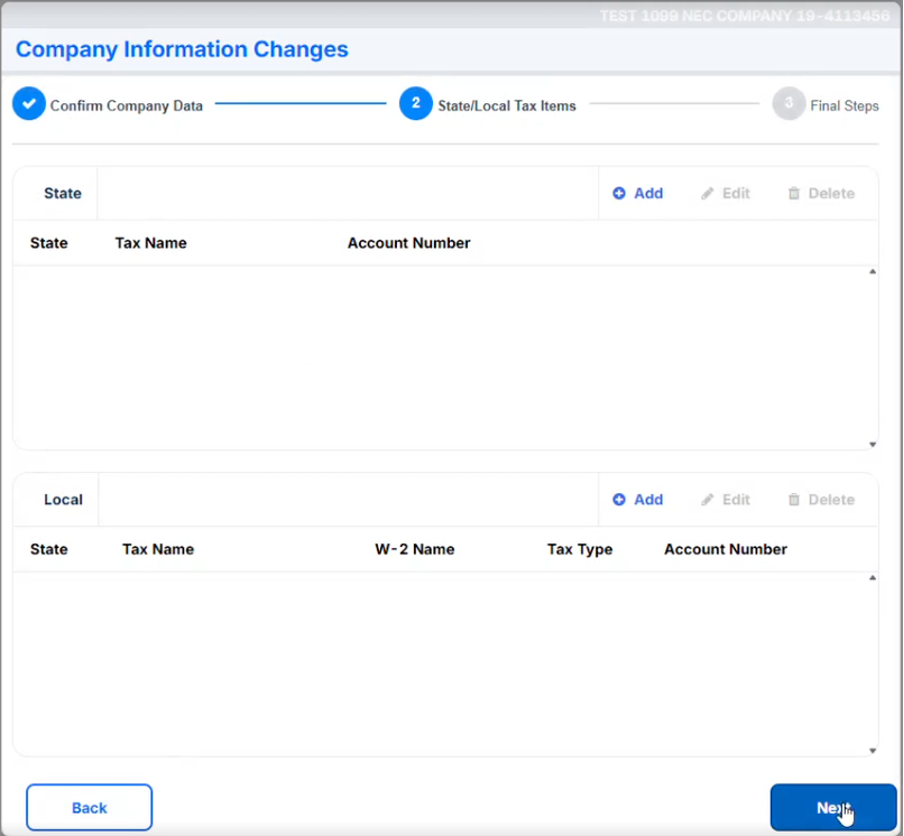
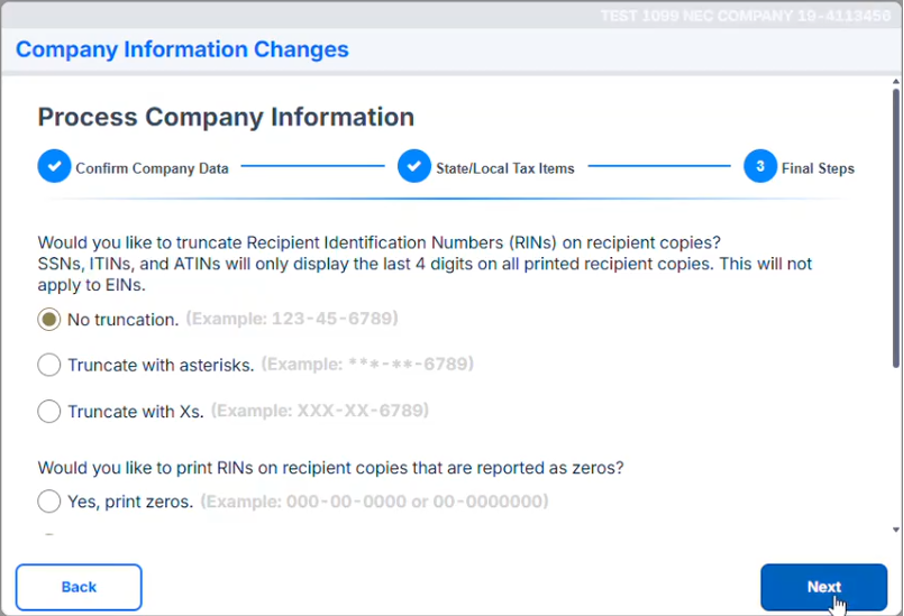
Company Setup
Read & review each screen during the process and click Next to proceed.
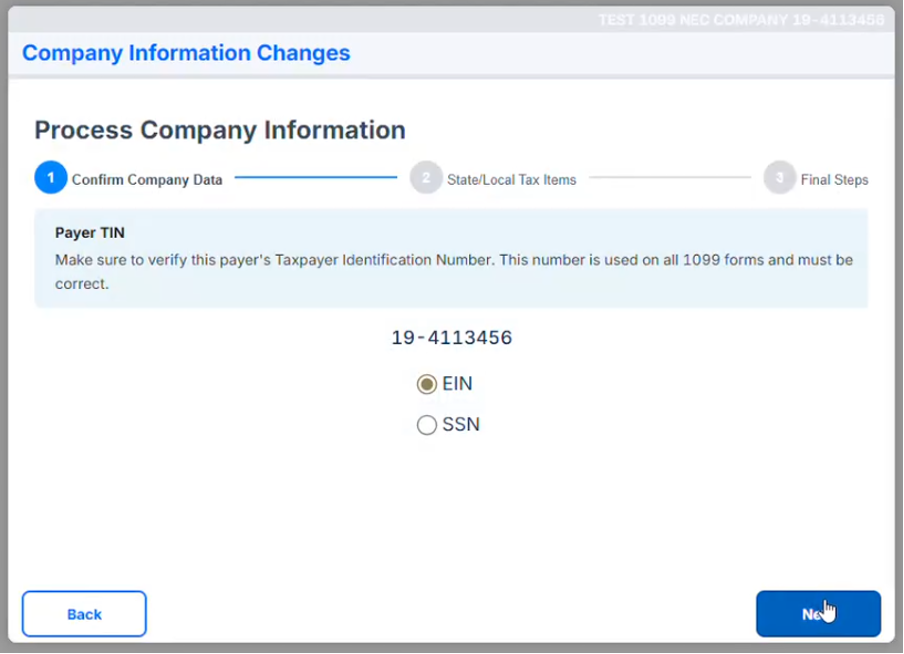
Red fields are required; enter the required information, and the Next button will become active.
Review & edit recipient/vendor information and correct any errors that may appear. Please note that changes made here will not flow back into NetSuite.
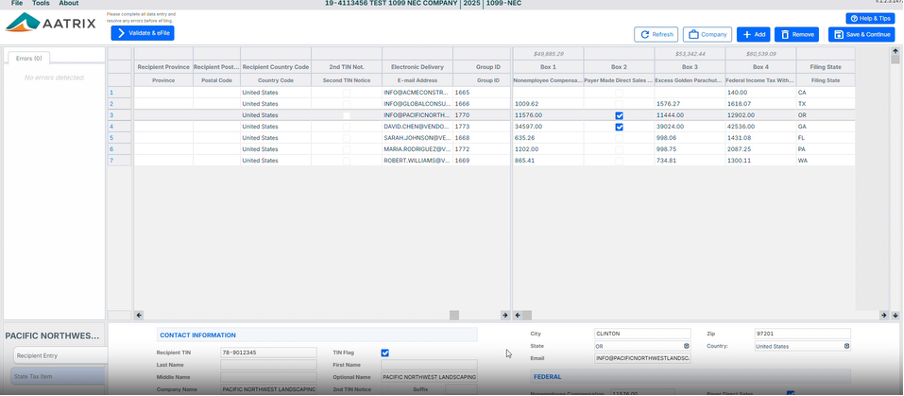
Select eFile Options, View your forms, and eFile.
You will receive an AFID (Aatrix Filing ID) and a confirmation email once you have completed the eFile Process.
Need Help?
If you need assistance at any step in the process, please contact our support team by clicking Help.
Just Ask Our Customers
Here’s what satisfied Aatrix® customers are saying about the convenience of automatic state and federal form processing and eFiling!
“Using Aatrix® saved me time, money, and was LESS STRESSFUL. Took back the forms, envelopes, and did not use the stamps and had a lot of money left over.”
- Weeks Farms Partners
“This software made my W‐2 preparation SO EASY! I could print everything as many times as I needed and the steps were so easy to follow.”
- Community Action Commission of Belmont County